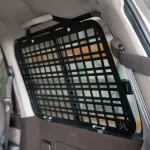
Loosely fit all brackets to the panel: Begin by attaching all the provided brackets to the Window MOLLE panel and the Adjustable Shelf. Ensure that none of the screws or bolts are fully tightened yet, so the components remain nice and loose for easy adjustment later.

Identify the top hole for the top bracket: Locate the top hole in the vehicle’s trim where the top bracket will be mounted. Remove the factory plastic clip from this location.
Increase the hole size: Using a cordless drill with a 9mm drill bit, carefully enlarge the hole to 9mm.
Protect the bare metal: After drilling, you may see exposed bare metal on the vehicle. To prevent rust, use a paint pen to seal the area around the hole.

Fit the rubber nutsert: Insert the rubber nutsert into the 9mm hole you just drilled. Since the fit is tight, we recommend fitting the supplied 5mm bolt into the nutsert first. Use the bolt to carefully push the rubber nutsert into place. Make sure not to push it too far—just until it sits snugly in the hole.

Locate the 6mm holes: Before securing the panel, find the two 6mm holes located just below the window. These holes are covered by plastic clips from the factory. Remove the plastic trims to expose the 6mm threaded holes, which will be used to secure the U-shaped bracket at the bottom of the panel.
Position the panel: With the nutsert in place and the brackets loosely fitted to the panel, carefully position the panel in the vehicle.
- The hook bracket should fit around the seat belt bolt.
- The long top bracket should align with the rubber nutsert that you just installed.
- The U-shaped bracket at the bottom of the panel should line up with the factory 6mm nutserts located below the window of the Jimny.

Secure the panel: With the panel loosely positioned and clipped over the seat belt bolt, start by fitting the 5mm bolt at the top into the rubber nutsert you installed earlier. Then, carefully and loosely fit the two 6mm bolts into the holes below the window. At this stage, the panel should be loosely secured and ready for final tightening.

Fit the second part of the seat belt hook: Before tightening everything up, fit the second piece of the seat belt hook. This shorter piece goes under the bracket you installed earlier and is secured with two 4mm bolts. Make sure the bottom bracket is fitted properly to secure the plate against the seat belt bolt.

Tighten all bolts: Now that the panel and brackets are in place, use one hand to position the panel exactly where you want it. Then, go through and tighten all the bolts, ensuring everything is secured properly.

Repeat for the opposite side: Follow the same steps to install the panel and brackets on the opposite side of the vehicle. Ensure all bolts are securely tightened once both panels are in place.


